
When we started house hunting the running joke was that I wanted one big f**k off room. Well when we found our house, which you can read about here, it was not immediately obvious that I would get the big f**k off room but within days of the offer being accepted the plans for the big f**k off room started.
To go one step back, all joking aside, we had moved from an open plan apartment in the city centre. I loved open plan living, the social aspects, the light and most of all the togetherness. We didn’t want to completely lose the feeling of the open plan all the while looking forward to a house that would give us different living areas. In this big f**k off room I wanted to be able to cook, eat, socialise, watch telly, read, drink tea, live.
The Plan
When we started out from offer accepted day, we immediately wanted to know what could and couldn’t be done. We started to study the floor plans, going through configurations before we spoke to the professionals.

The kitchen, as it was, was not a bad size, but it had no real place for a table and no heating. It felt disconnected from the the rest of the house, the only access from the house was a door at the side of the dining room, the first thing you saw was the cellar door, the kitchen felt like an after thought. The dining room was wasted space, and more of a thoroughfare than a room in its own right.
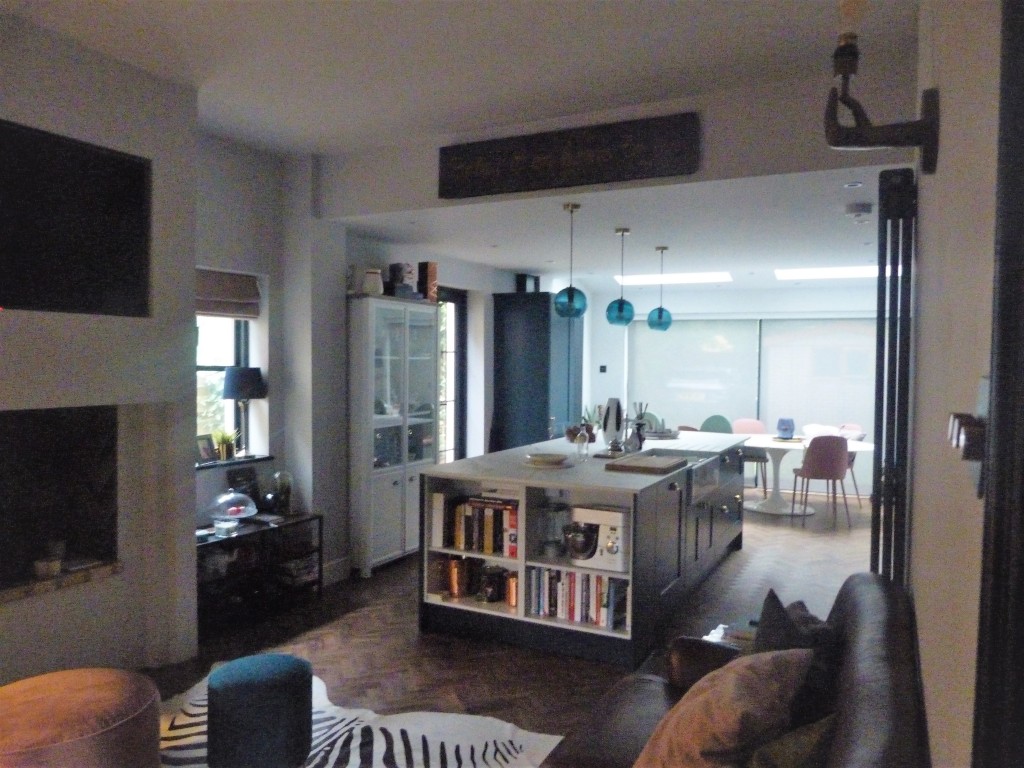
The decision was made to remove the wall in between the dining room and the kitchen, extend out by 1-2 metres, but keep the concertina doors to the living room. This way we would have a large dining, sitting, watching telly, cooking kitchen (the big f**k off room) but a living room in which could become part of the space or be closed off as our cosy escape. This was to become our whole ground floor, it was really important we got the space right, how we wanted to use it ensuring all the plans had our life in mind.

It was time for the professionals. We had a family friend who works in ground works and construction, he helped us with the planning permission queries, worked with the council to get our building regulation notice and made sure that we had everything in place. The drawings were then completed; as far as renovations went this was straight forward, in theory it was just one big rectangle. The biggest concerns were the steels and the foundations. We have water manholes in our garden and we had to ensure that access was still possible, the foundations could not disrupt or block this access.
The steels are where it gets real, when you know if everything you want can be done. Oh the steels, those glorious girders that were literally going to hold our world up. From the drawings, we enlisted structural engineers to ensure all the calculations were right and the steels were going to be spot on.

The last part of the floor plan was the decision to create another doorway, deciding that the sliding doors at the back should not be the only access point to the back of the house – our gorgeous British weather and some very large trees would only cause a gale throughout the house every time those doors were open. The back of the house is also where we park our car so practicality won over. We placed french doors where there used to be a window. This was not part of the original plan but once it was decided we couldn’t believe they weren’t. They just made so much sense and fed my Crittal fantasy just a little.
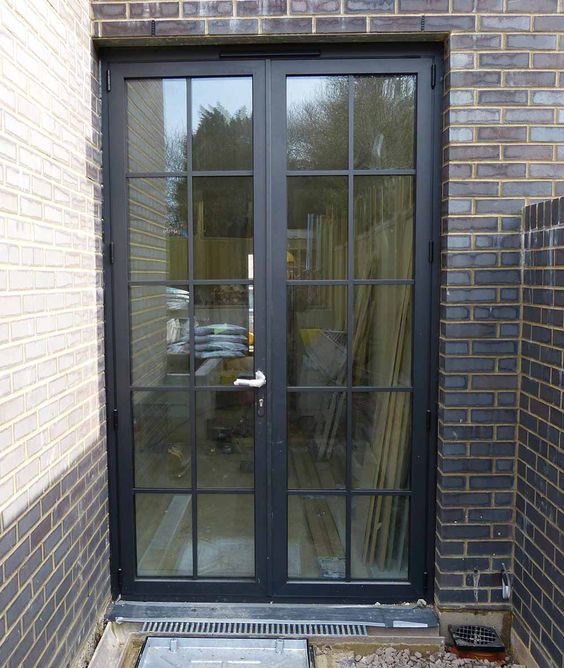
Crittal Door Inspiration from Pinterest 
Ours
Materials were fairly easy for us to decide. As the extension was only small in relative terms, the easiest thing to go for was a brick build, we chose reclaimed brick.
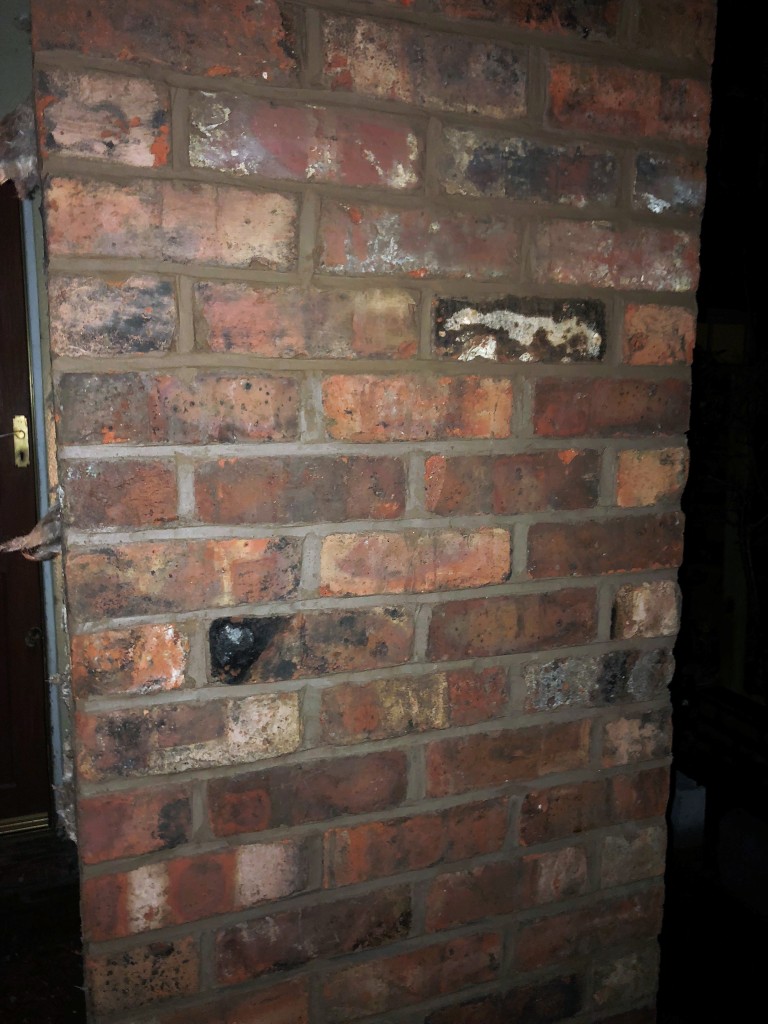
They were the perfect choice, I didn’t want the perfection and smoothness of the red brick, I wanted the extension to look like it had always been part of the house in some way.
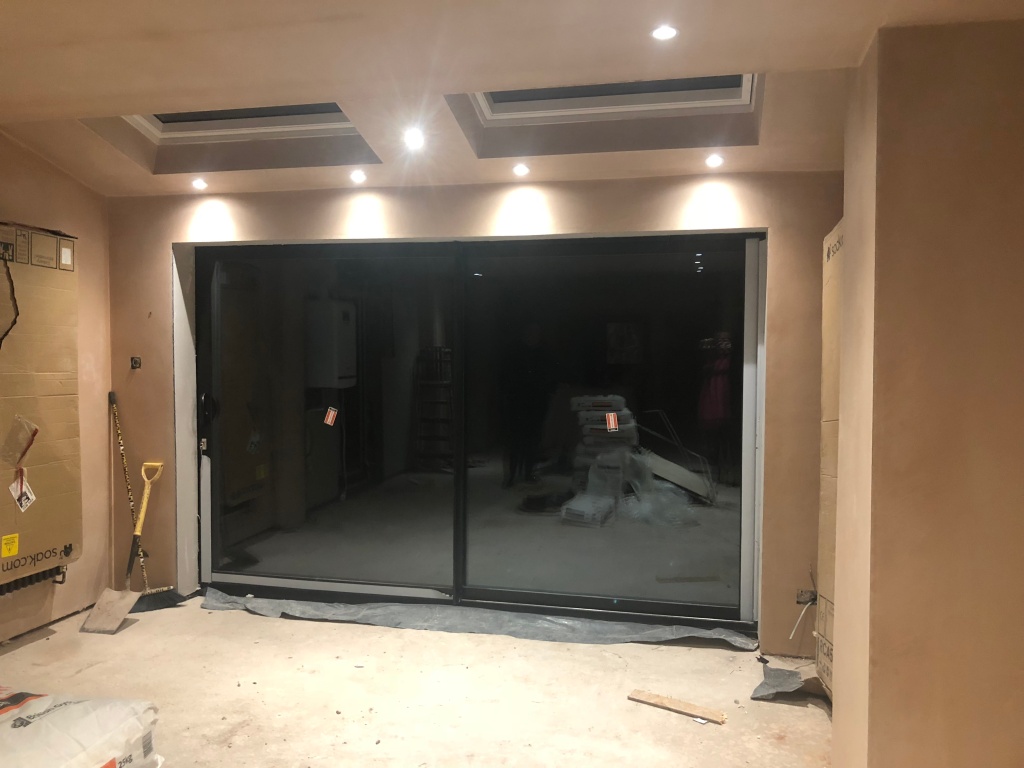
It was always sliding doors to be fitted in the new extension for me, Mr P and family thought we were going to go for bi-folds but I wanted the cleaner lines that I felt sliding doors could give. It isn’t the widest of space, and I did not want multiple frames blocking the light and the clean lines. Bi fold doors also have to fold somewhere, sliding doors would give us maximum space in and outside of the house.
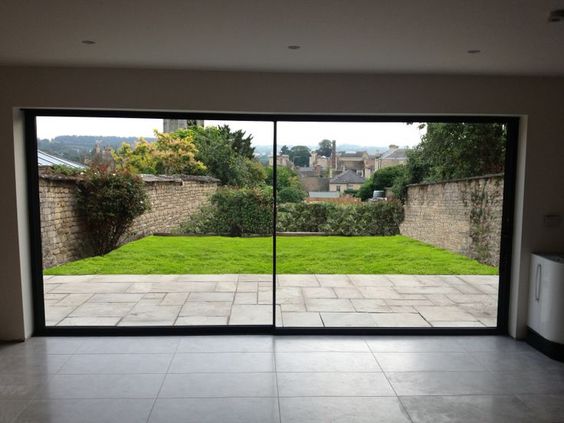
For the doors we picked black aluminium, with black handles. I must have been asked by everybody if I was sure about this – what is it with people and worrying about black? Black is awesome. I love Crittal Doors, but alas, we could not stretch to the expense, so we picked the best flattering imitation we could.
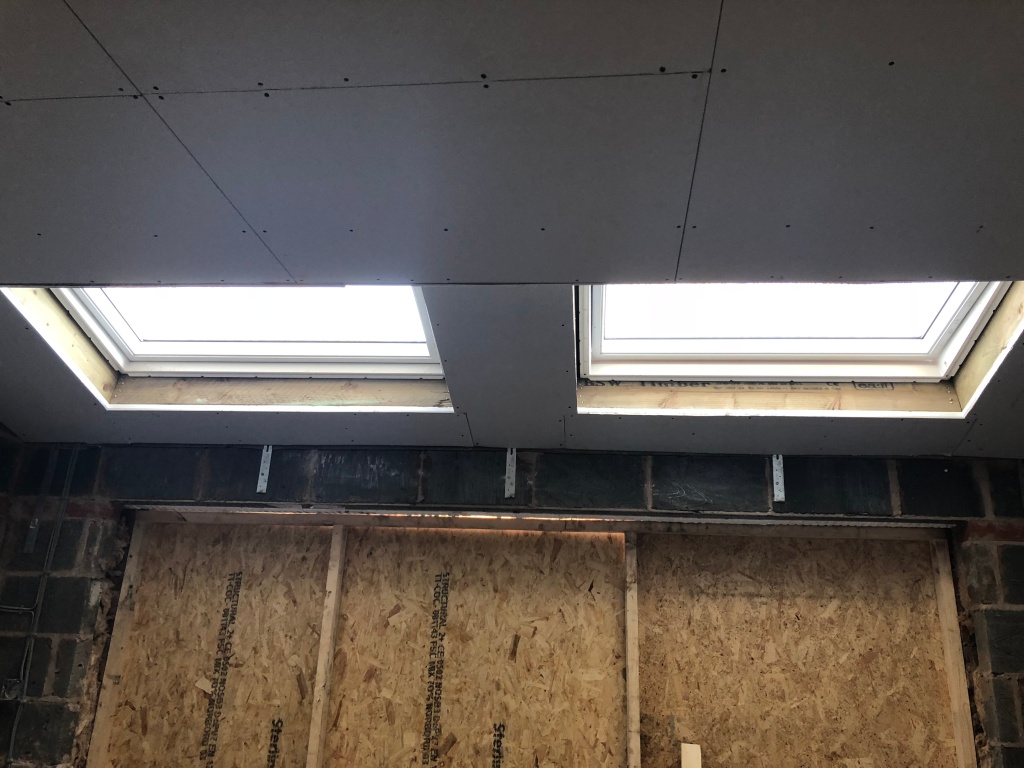
There would also be two large Velux in the lean to vaulted roof of the extension for extra light, for extra air, for well, just extra.
And so it began…………
On Wednesday January 10th 2018 the first spade went in the ground.

For the first two weeks all the work was outside, digging and setting the foundations for the extension at the back of the house. Even before the first speck of dust inside the house was created I wasn’t quite prepared for the dirt and mess that would be created.


After a few days of muck, digging and concrete the breeze blocks started. After the breeze blocks came the beautiful bricks. All of a sudden the new part of our house was beginning to take shape.
Two weeks after the first spade, the wall in between was being dismantled, the ceiling torn down and the old kitchen was ripped out, all of the beige, orange and yellow glory was gone.The wall in between take down was a big day. This was the day that would tell me if all the decisions up to this point had been the right ones.


Monday 3rd February was the day of the steels and the insurgence of the steel stilt.


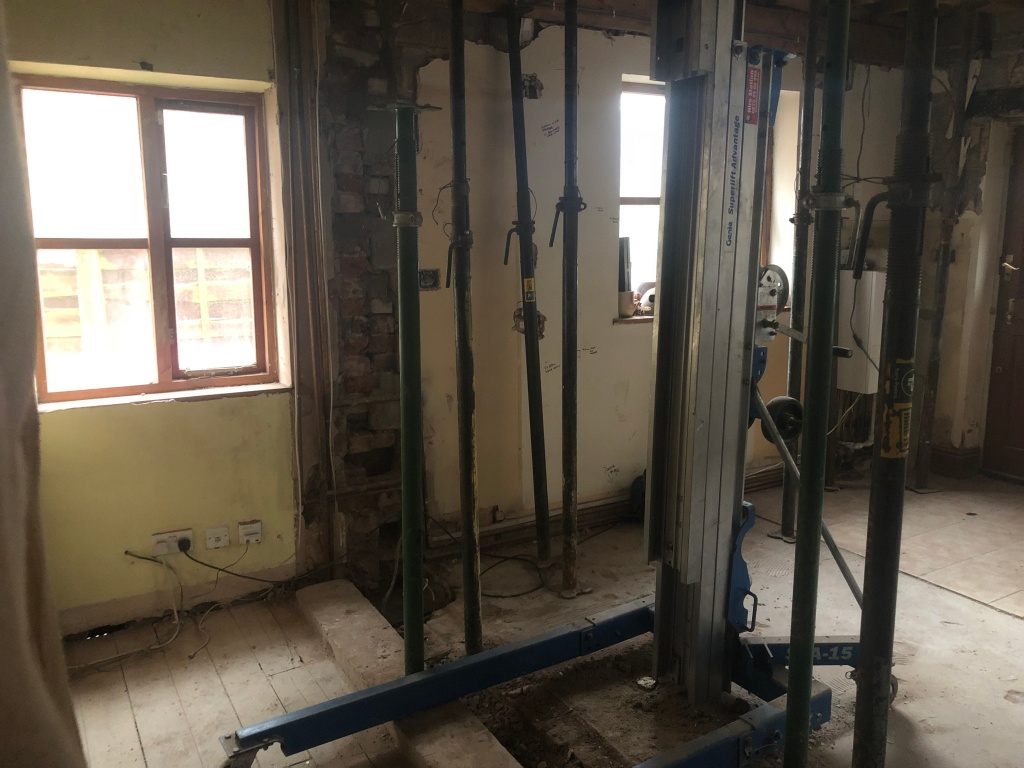
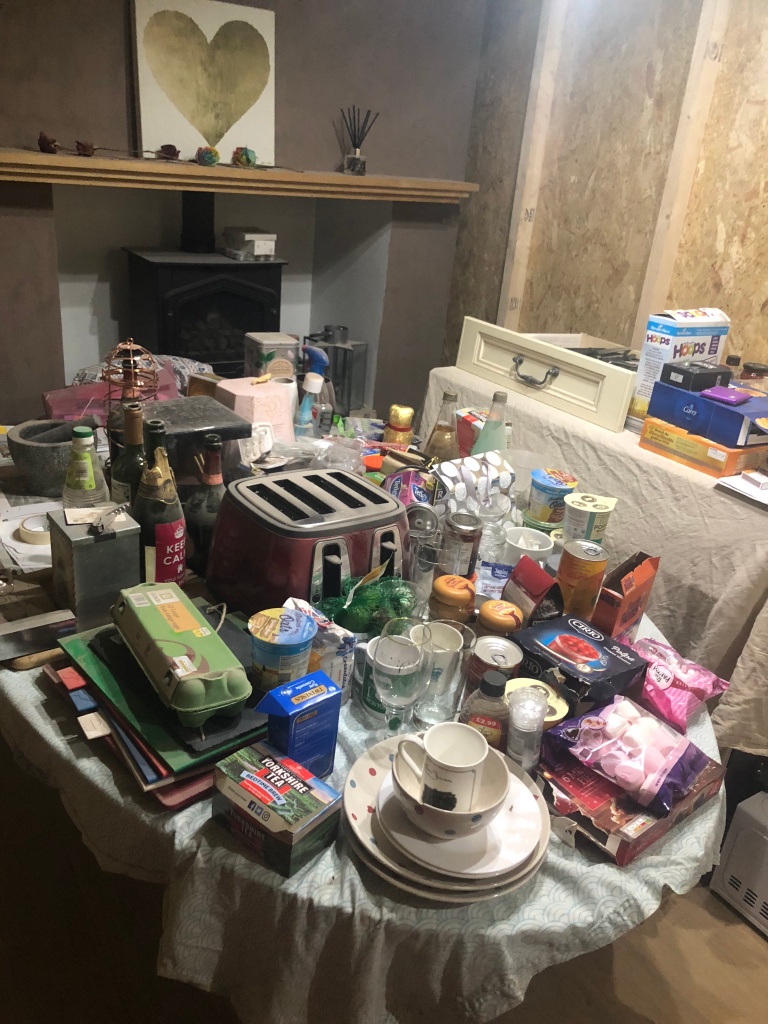
It was at this point, it all became a bit much. The overwhelming feelings were weighing down on my shoulders and our standard of living was suffering. Bear in mind we had been living with a grotty kitchen and sitting on blow up chairs for three months our standard of living bar was not raised that high. It was time to move in with my parents, to retain our sanity and keep our jobs.
The steels fit perfectly and I loved them. I loved the way they looked, I had admired renovations with exposed steels for some time, but more on that later.
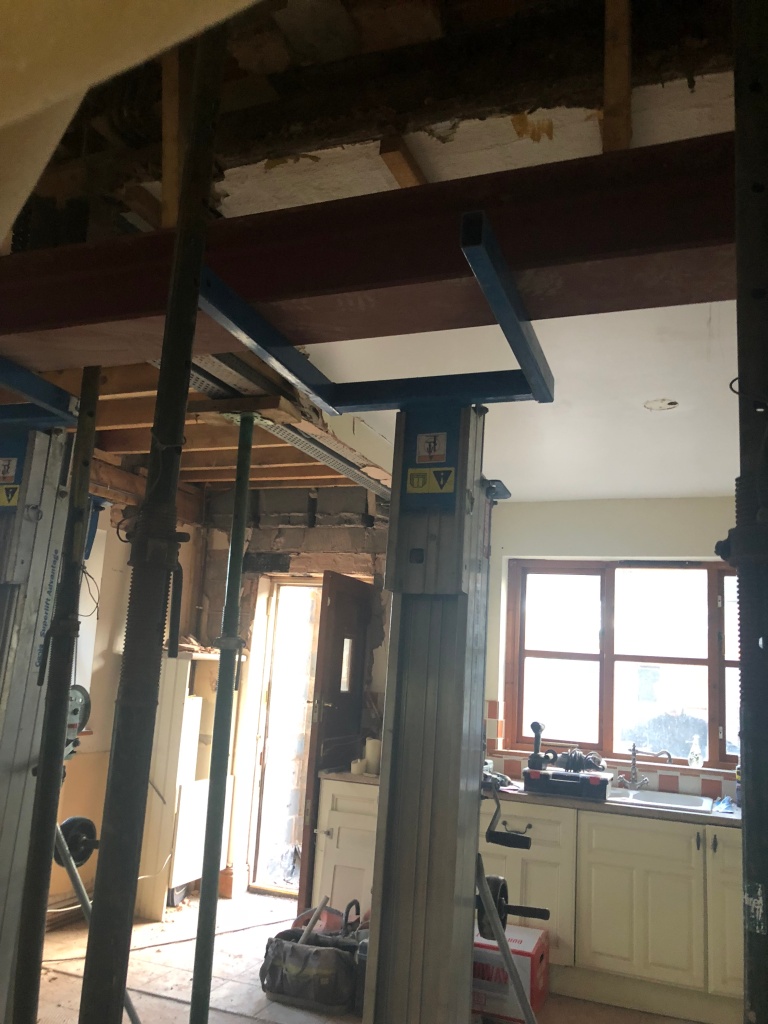

This was the first kink in the road day, too. The house had been through a few extensions before it became ours. The kitchen had already been extended once before , from a galley kitchen to the rectangle that we inherited, the bedroom above, which I think had begun life as a bathroom, had been extended at the same time. In our removal of the ceiling and the wall in between we learnt that the bedroom was currently being supported only by a flimsy timber frame, to make this safe we would need more steel.
What it also meant was more money, but thank goodness we actually decided to extend when we did as we may never have found out about the shoddy workmanship that was under our feet and over our heads – not until it would have been too late that is. Part of our original plan was to leave the steel beams exposed, I have always loved that particular look, and I was looking forward to getting them painted and lit. Unfortunately, that was not meant to be, due to our differing ceiling heights and needing additional steels it would all look too uneven unless the ceiling was fully boarded, steels boxed in and plastered.

It’s funny how plans change, I was so sure I wanted exposed steels and now sitting in the finished room I cannot imagine them. I suppose some things are just meant to be.
We didn’t have too many other wee surprises, especially in comparison to many renovation stories. There are two fires on the ground floor of our home, unfortunately both gas as the chimney was long closed during earlier renovation works, and now with the loft extension to think of reinstalling the chimney would just be one step too far for us. We would work with the gas fires we had. We were not going to replace them straight away to keep costs down, but then on our gas safety check the gas was cut off to the burner fire, it was condemned and if we wanted to use a fire in the winter it would need fully replaced. We had a gas fitter on site to relocate the gas pipes for the kitchen and the boiler, and upon his advice we went ahead and replaced the fires. We live in a warm house, our soak radiators heat our space very very well. Yet, there is nothing more cosy than when the fire is on; I even love a fire inside on a summers evening, when the heating hasn’t been on it just takes the chill out the air. The improvement in the aesthetic was not lost on me either. Another instance where fate, or dodgy gas, steps in to give you exactly what you need.


The Hardest Choices
Aside from the dust, the mess and the chaos, there were parts of renovations that I had no clue about at all, and wasn’t told when I was researching mood boards. There is a part of the renovation which is called the first fix. If you are an experienced renovator you will be well aware of this. I was not. This is the point you must decide where all utilities are going. Our renovation included a brand new kitchen with gas and water in completely different areas to where they had been before. The kitchen design itself had to be completed at the same time to ensure that the water and gas pipes were all going to be in the right place for the kitchen to be installed. We had to decide where every light switch, every socket and every light was going to go.


I found this very trying and difficult to say the least. I had mood boards of colours, sofas, kitchens and all the things I wanted to make pretty.

Yet I had no idea on the placement of pendant lights over an imaginary island, should we have spots and if so how many? What other parts of the room need lighting? The questions just kept coming. After the building plans, and the structural engineers all plans were done by myself, with nudges from Mr P and family. The pressure to make the right decisions was real. Me and Mr P got our heads together, took a deep breath and followed the rule that I have for most of my life so far, speak to your parents and then go with your gut. My Dad was a huge part of this renovation, not only our sounding board, but pretty much our project manager, being on site when we couldn’t, helping push the builders when they needed it. My Mammy was the one keeping me sane and encouraging me to go with my instincts.
Attention to detail is hugely important; The love is all in the details. Everybody’s attention detail is different and what is important to you will not be important to others. It was important throughout the house that it looked like us and was our style not necessarily what would look good to others. Anyway, we had a list of things to choose:
- Gas Supply
- Water Supply
- Electricity supply – if you are doing a kitchen redesign you need to think about supply to a kitchen island, cooker hood, strip lighting, work lighting. Do you need to upgrade your fuse board – we did.
- Sockets – where and what?
- Spots – where do you want them, are they the main source of lighting or work lighting?
- Any other lighting – wall lights, pendants, lamps etc
Heating – we had to think how were going to heat the room aside from the aforementioned fires. Underfloor heating was given a great deal of thought. Cost vs need. We had always thought underfloor heating would have been a given, but we had already lived in the house for three months, we knew it was a warm house. Even the old afterthought kitchen with no heating was never really that cold. The decision was made against the underfloor heating and we started to look at radiators. Radiators to me are a necessary evil – the only ones I had looked at with longing eyes were the old Victorian cast iron beauties. We could have gone down that road but were concerned where we would be able to place them between all the doors and windows that our room would have. Then I found soak.com. Immediately I fell in love with their tall traditional triple panel anthracite radiators – these had all the charm of a cast iron radiator, with a slightly more industrial look, but all the heat. They fit perfectly on the wall spaces we had, and I just love them. Yes I love the necessary evil.

From the beginning of the renovation my Dad spoke about lighting on repeat, for him it was so important that we got the lighting right. In my head I had thought about the beautiful Swoon pendant lights I wanted, the Om Mudra wall light I had my eye on from Rockett St George (I had these delivered months before the actual kitchen was delivered)


I kept harping on about about how much I hate spots, they are so uncool, not beautiful not my vibe bla bla bla. How glad am I that nobody listened to my brattish ways, and forced me to pick where I wanted spots. We picked white spots, these blend in to our room painted in Farrow and Ball Blackened, we ensure they as flush as humanly possible to create the glow without the glare. We would have loved fully recessed spots but due to our steels and the ceiling issues we had there would not have been enough depth in all areas; if you want to read a real masterclass in kitchen lighting then you need to read this on Kate Watson-Smyths’ awesome interior blog. Back to the spots I have no idea why I created such fuss, I still have my beautiful pendants and my beautiful Rockett st George wall light but I also have spots to highlight the working areas, to bring light when it is necessary and offer a little subtle glow when needed.
It is important to note here that where we could in this renovation and since throughout the house we have changed normal switches to dimmers. Dimmers make a huge, a missive difference to all lighting and particularly to spots. Dimmers offer you options when it comes to making your lighting work that little bit harder for you; by creating layers of lighting the room can be seen, literally, in its best light.
Light switches. Never did I think I would take light switches so seriously, and agonise over which ones would create the perfect look. I didn’t have to agonise for too long when I fell in love with Dowsing and Reynolds and the switches below.

After seen no other switch would ever come close.
We also changed all our plug sockets to matt black; with some of them also being Usb inclusive sockets – don’t know how we lived before. These ones below:

Since the big f**k off room was finished, we have replaced all other sockets and switches to matt black (oh apart from two that were missed by the electrician, but will be remedied on their next visit). The power really is in the details, the finishing of the room makes it complete.
All skirtings were fully replaced; there was no original coving left in this part of the house we chose at this stage not to replace it, to keep the ceilings high and to keep the flow from the new part to the old part clean lines. In the living room we have two curved walls, almost pillars at the bay window, had we put in coving this could have looked messy and clunky; in the end these curves were the biggest part of the decision. What was a very remarkable note of the renovation was the way the skirting around these curved part of the walls were dealt with. When we moved into the house the skirting was simply squared off around the curve meaning there was a triangle of filler and dirt; you also didn’t want to get too close with your ankles for fear of broken bones. One of the joiners in the renovation team took the time to change this for us and we will be eternally grateful. He painstakingly cut slithers of skirting board and applied them one by one until there was a full curve, they were then delicately filled and sanded down by hand until they were smooth enough to be painted.
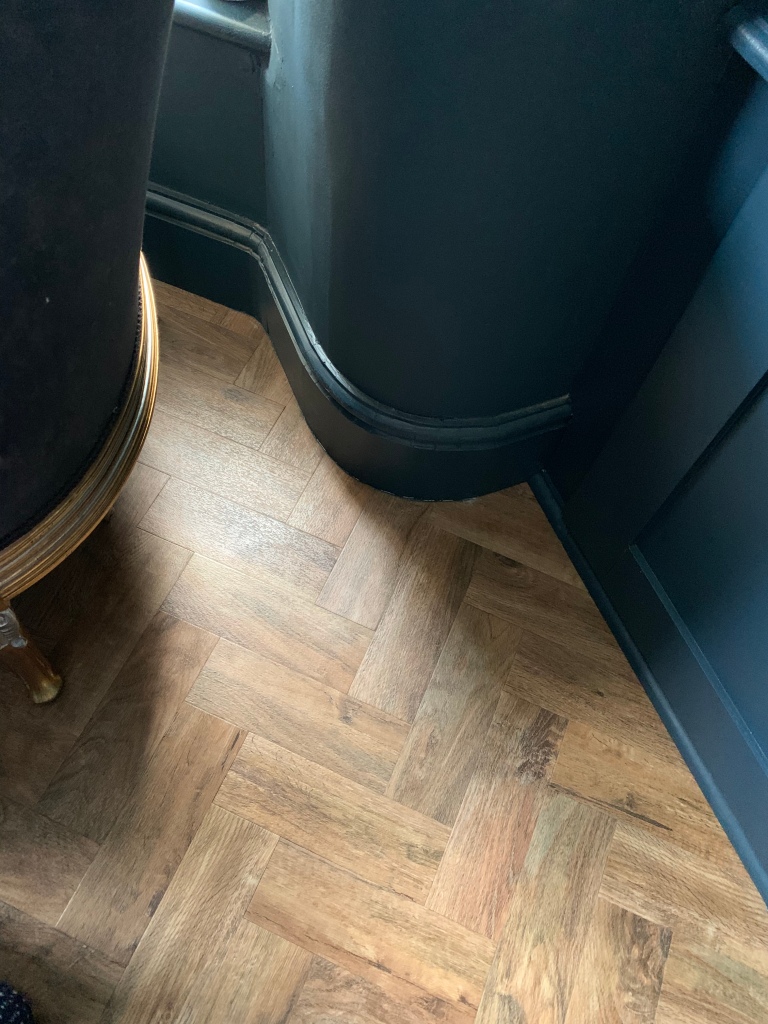
No photos unfortunately of the unpainted curve, the joiner did the work so under the radar and without drama it was completed and painted before we had a chance to catch our breath. I cannot tell you the smile these curves right down to the skirting board give us on a daily basis. Good tradesman are really something to behold.
Colour
Now we are talking. The fun part. Colours and everything coming together was the part that had been in my head for months and months. I had mood boards that had been collated 3 months before hte first spade went in tot he ground.
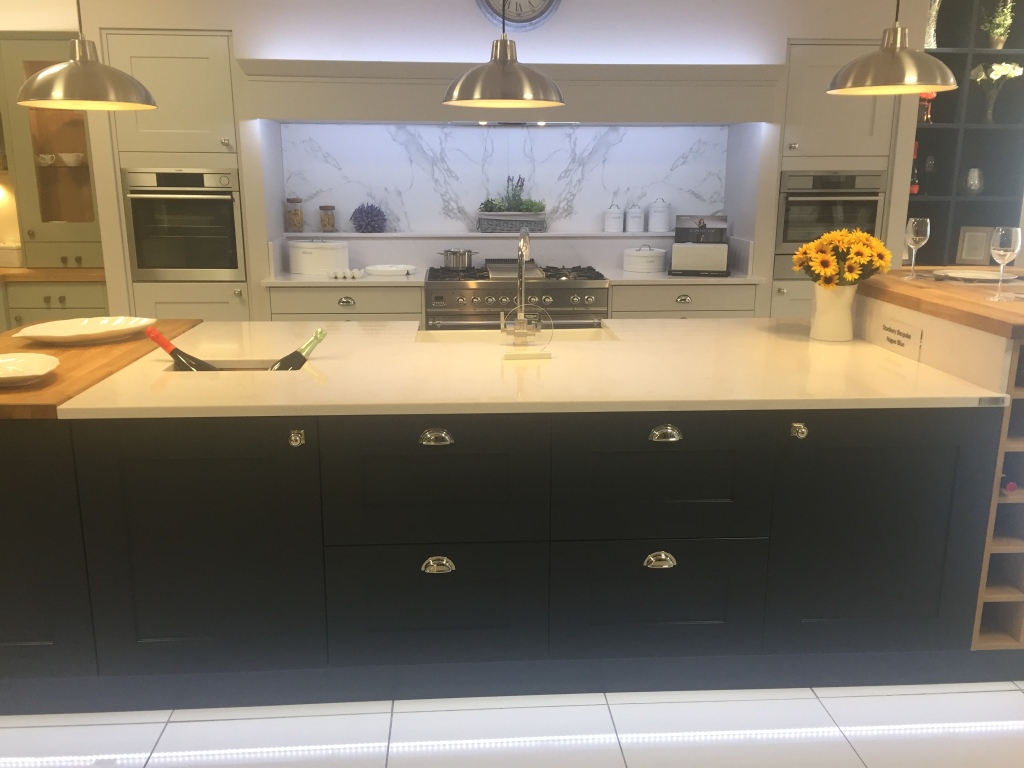
The colour of the kitchen is where it all started. I had been lusting after the dark kitchens of Devol before we even bought our house, Erica Davies then started her kitchen renovation and I fell in love, the obsession had started. A black kitchen had been my original focus, but with Erica Davies kitchen and Mr P’s favourite colour of navy I was beginning to be swayed in the blue direction.

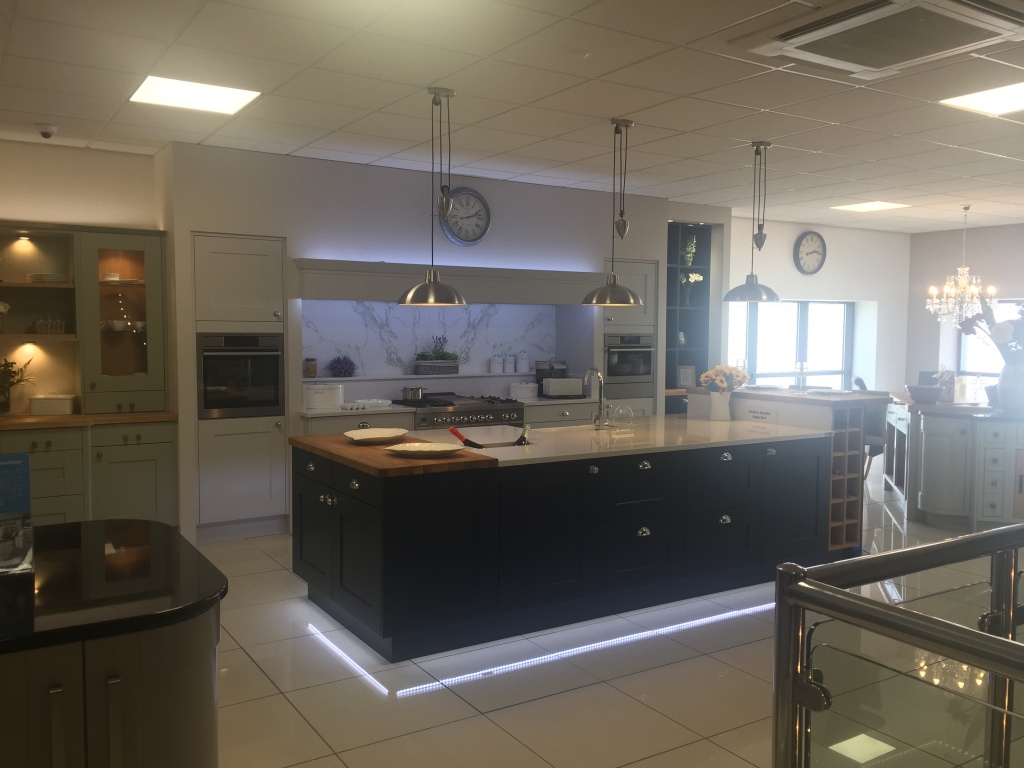
Researching kitchens is a minefield; so much choice. As it is for many budget was a huge deciding factor; we had already spent tens of thousands on the actual renovation. We wanted to make sure that we had the style and quality we were looking for but couldn’t afford to go to the more bespoke end of the market. One of my many evenings obsessively trawling the internet I came across DIY Kitchens. Their website is great, you can wander around their showroom from the comfort of your computer to get an idea of the options they have on offer, you can look at customer testimonials, kitchens that have been fitted, basically anything you need to know you can get on their website. I will also note here that their website is also where you go to design and pick your kitchen but more on that in another post. We paid a visit to their showroom in Wakefield, it is a kitchen theme park, 32 kitchens of all styles and colours, I won’t say too much here as I am going to write a separate post on the kitchen itself, but as soon as I walked up the stairs in the showroom and saw the kitchen at the top I knew that was the one I wanted.

So Navy, well to be precise Farrow and Ball’s Hague Blue was one of our colours, we now just had to pick the rest.
The walls of the kitchen I wanted them to be light in contrast to the dark kitchen. With the sliding doors, french doors, Velux and existing windows we were doing everything we could to bring the light in from the northerly side of the house, I wanted our colour choice to maximise this. I am not a colour expert in any stretch of the imagination but I definitely was veering towards the cooler end of the white scale. Men, definitely the ones I had to ask, find the scale of whites bemusing, I questioned my life choices when Mr P stated that surely white is just white, as multiple squares of paper were painted various shades of white, stuck to walls or thrust under his nose. Grey white walls and crisp white skirting boards and woodwork have always appealed to me. Think Parisian apartments, with paint colours that look like they have not changed over the years, yet, remain clean and beautiful. For this reason I was drawn to Farrow and Ball Blackened with Wevet woodwork; against each other the Wevet ensures the Blackened looks cool and grey without greying the room out. To this day I still love the combo.


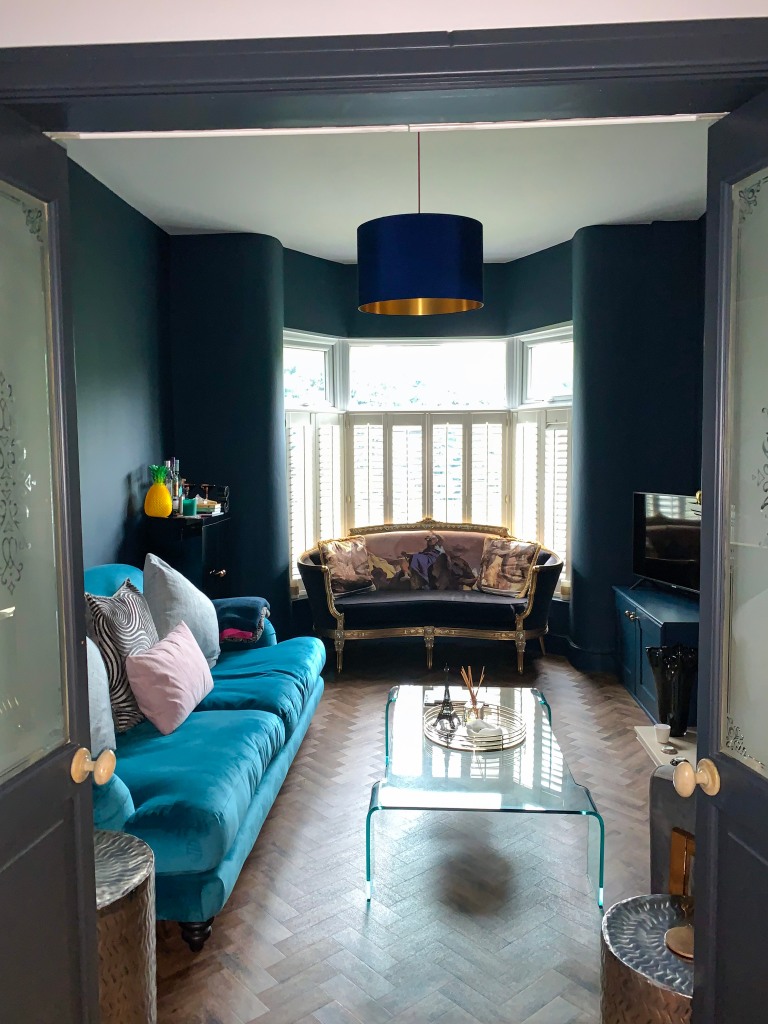
Hague Blue. When you fall for this colour you fall hard. I knew I wanted a dramatic living room; glamourous and cosy were the two words of the room. Hague blue would give me the drama I was looking for and the perfect canvas for the gold, brass and metallic hues I knew I would be attracted to when accessorizing. All of you dark interior lovers out there will know when you start sharing your ideas with people, there are some, who look at you like you have three heads when you mention a a dark room; painter and decorators up and down the land rolling their eyes. It is now the room that everybody loves, the room they gravitate towards and the room that gets the most oohs and ahhs. It currently has a Wevet ceiling; it will be interesting to see how long it remains so. The skirting boards were also painted Hague Blue to ensure the drama was room wide.

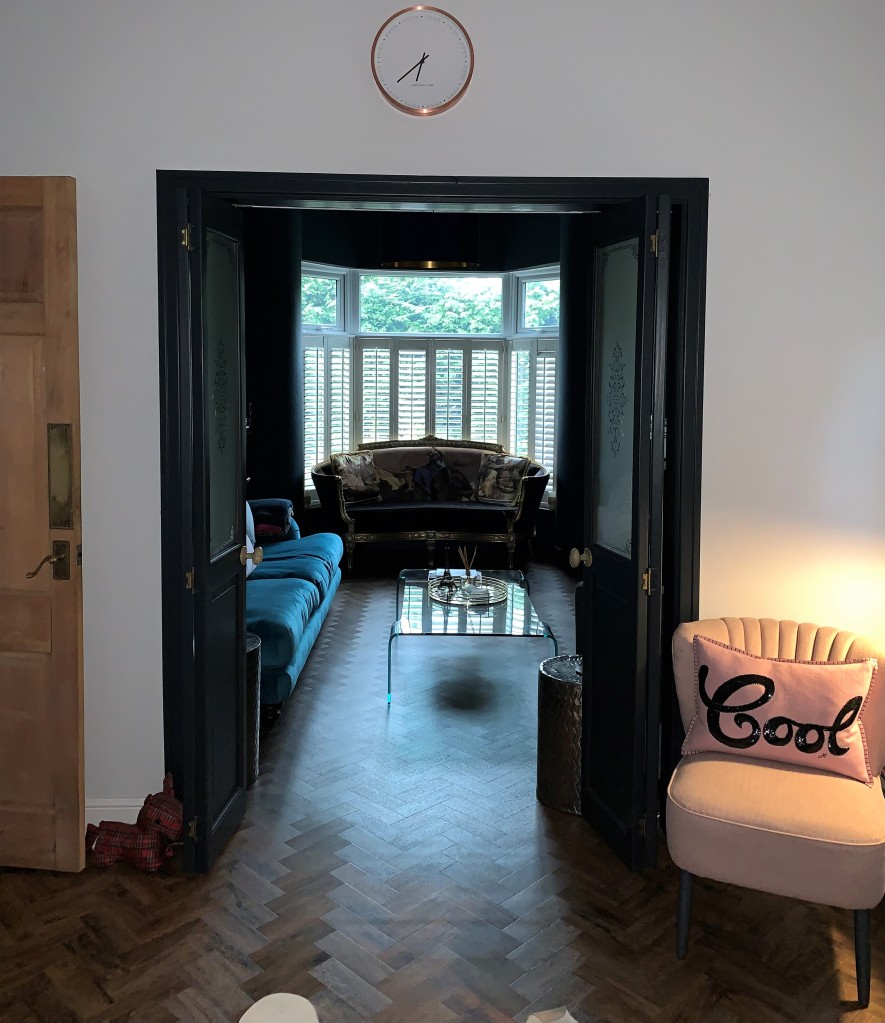
Leading to the living room there are concertina doors that we retained to keep a space that we could close off to make cosy should we wish. These were originally a stained pine; the fireplace in the living room was also the same stained pine. These too, could have been painted in the Hague Blue but I decide to go another complimentary dark colour that had been a favourite for years and years, Railings. With black blue tones, this was the perfect compliment against both the Hague Blue and the Blackened depending on what side of the doors you were looking at. There were also two wooden windows that needed to be brought into the colour scheme, painting these Railings brought it all together.
All of our paint was bought from Decorating Centre Online, using their colour match service. Until this renovation I really had no clue about what paint went with what. Helen and her team guided us on what we should be using for the kitchen space, living room space or woodwork, taking into consideration wear and finish. Often, I had heard that colour match services never quite lived up to the depth of colour the likes of Farrow and Ball could provide. You could not tell the difference between the tester pots of the real thing and the paint we bought from Decorating Centre Online. The cost and the different types of paint we could get colour matched gave us the choice to do what we really wanted with our renovation, and since throughout our home.
Our Home
I never dreamt that we would have renovated; I can’t say it was ever a definitive plan. We fell for an area, then a house, and finally what we could do to make it a home. I have the utmost respect, literally worship and hands down, to those that tackle real renovations. Those who do the work themselves I could not admire more. What the renovation has taught me (and the reason I think it becomes an obsession and an addiction) is how it feels to make a place your own, to really think about how you use your home and how you want to live. We still have lots to do through the house but up to this point it has been totally worth it.


So there we have it, through lots of dust, tantrums, steels, plaster, paint and dreams I got my one big f**k off room – it’s all ours and our house has started to become our home.

What a beautifully written and inspiring blog post . Blood, sweat and tears but oh my , was it worth it ❤️
The build and the blog 🤪😂🥰
LikeLiked by 1 person
Thank you. It is all worth it in the end.
LikeLike